13. REAR WHEEL/BRAKE/SUSPENSION STRYKER 125/150
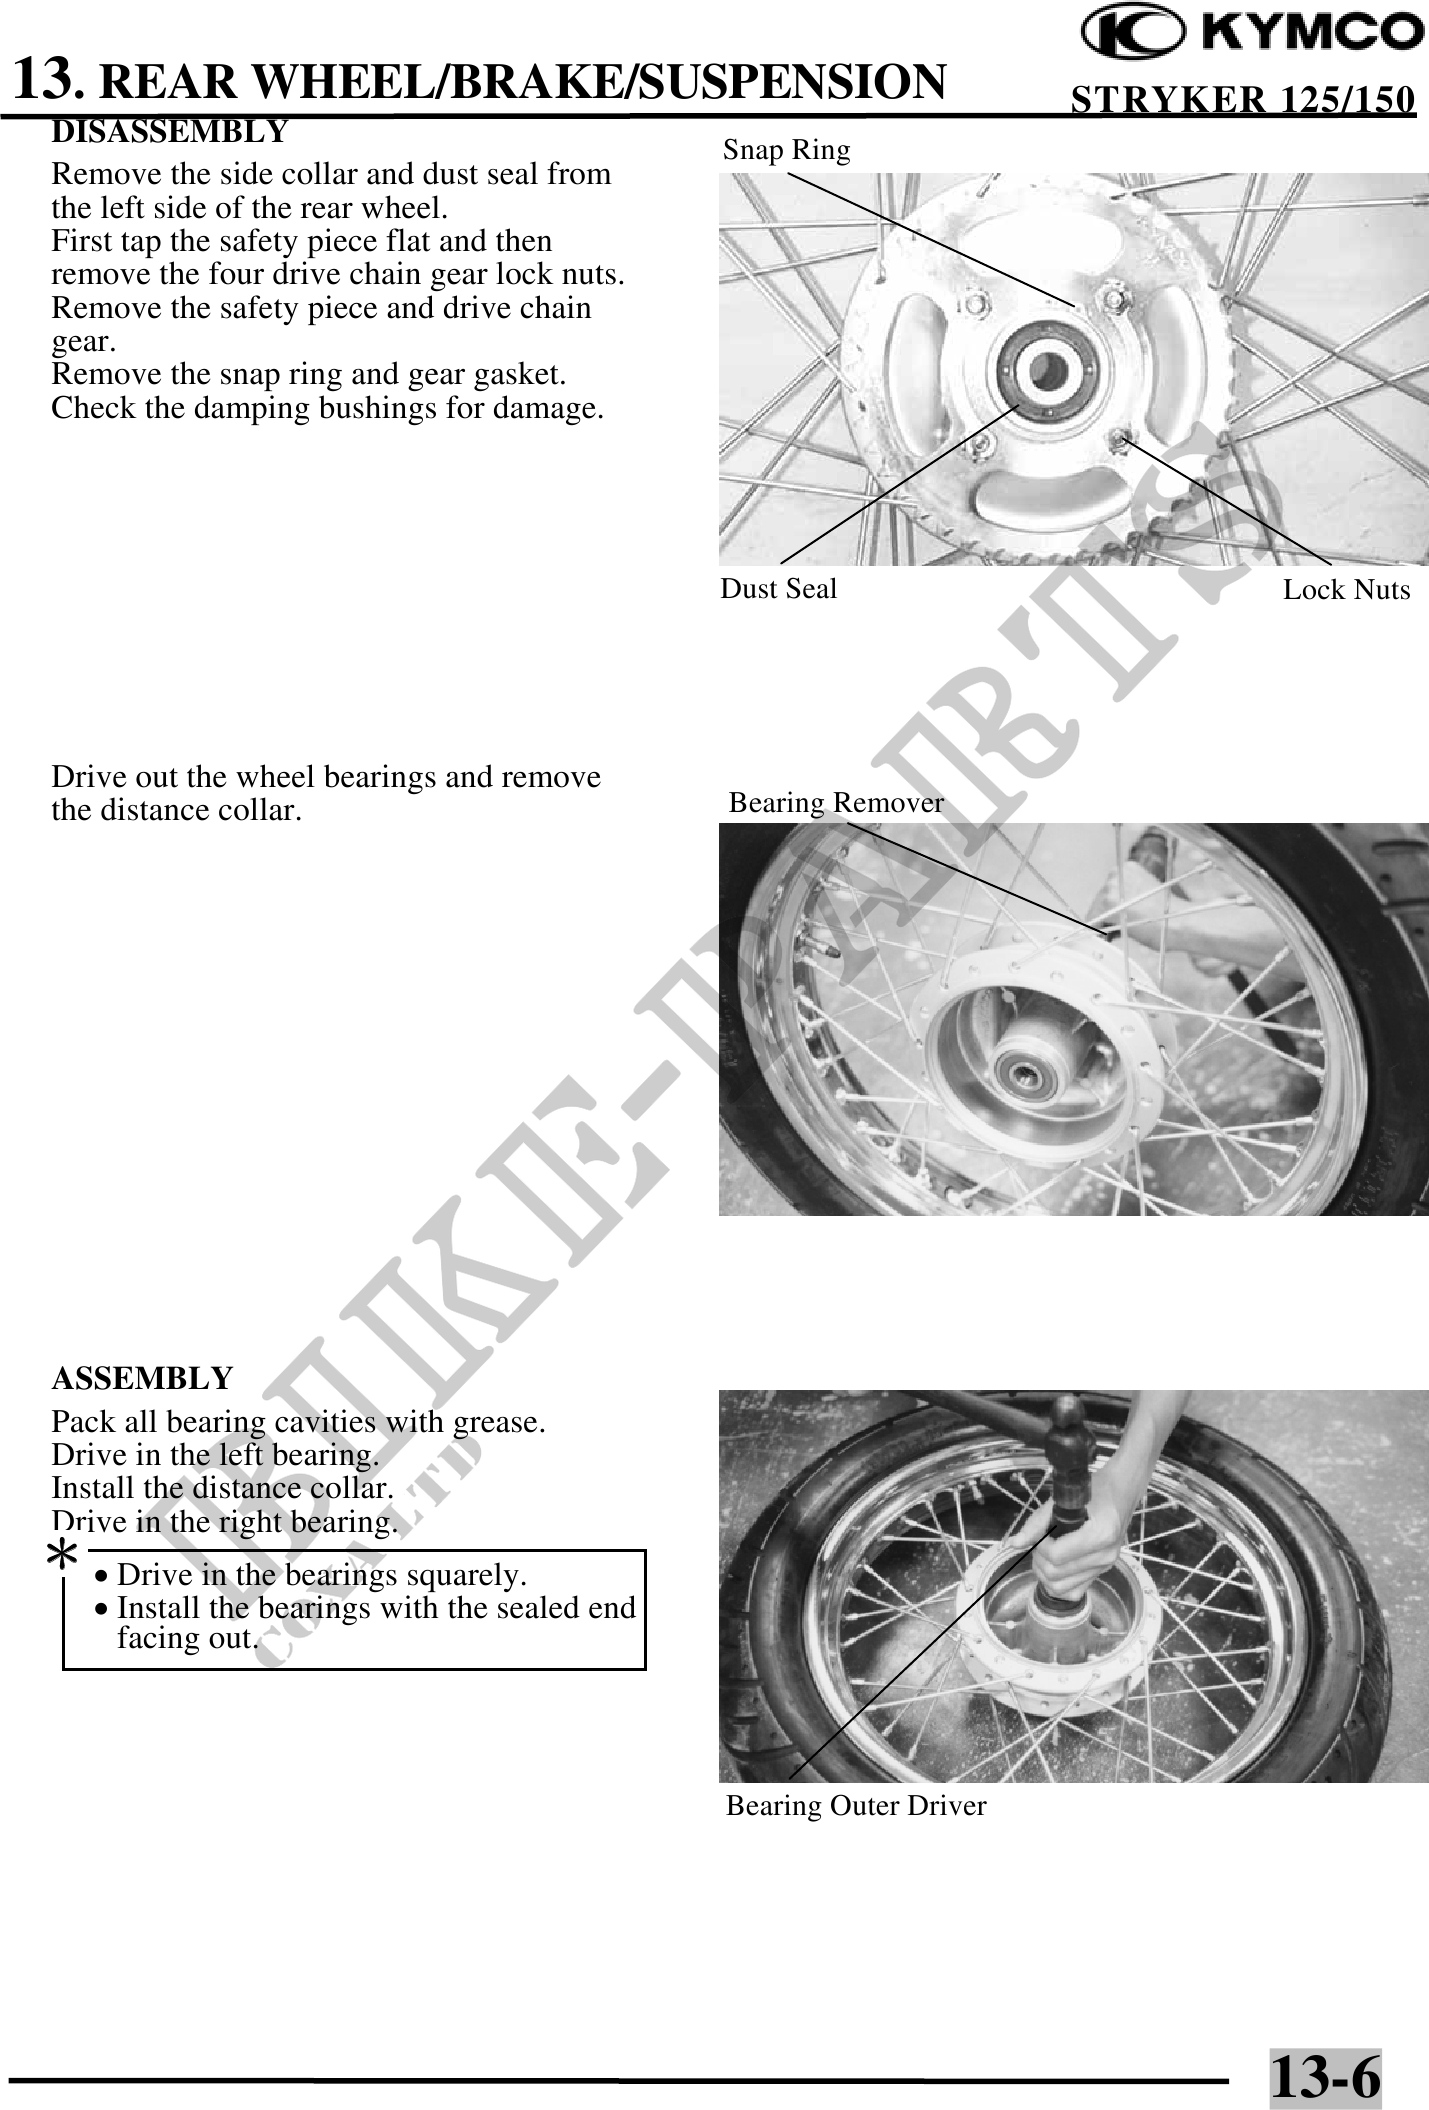
DISASSEMBLY
Snap Ring
Remove the side collar and dust seal from
the left side of the rear wheel.
First tap the safety piece flat and then
remove the four drive chain gear lock nuts.
Remove the safety piece and drive chain
gear.
Remove the snap ring and gear gasket.
Check the damping bushings for damage.
Dust Seal Lock Nuts
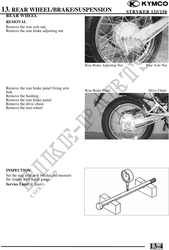
Drive out the wheel bearings and remove
the distance collar. Bearing Remover
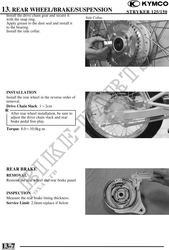
ASSEMBLY
Pack all bearing cavities with grease.
Drive in the left bearing.
Install the distance collar.
Drive in the right bearing.
· Drive in the bearings squarely.
· Install the bearings with the sealed end
facing out.
Bearing Outer Driver
13-6