18. STARTING SYSTEM STRYKER 125/150
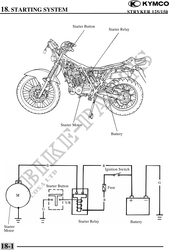
STARTER MOTOR
REMOVAL
Before removing the starter motor, turn
the ignition switch OFF and remove the
battery ground. Then, turn on the
ignition switch and push the starter
button to see if the starter motor operates
properly.
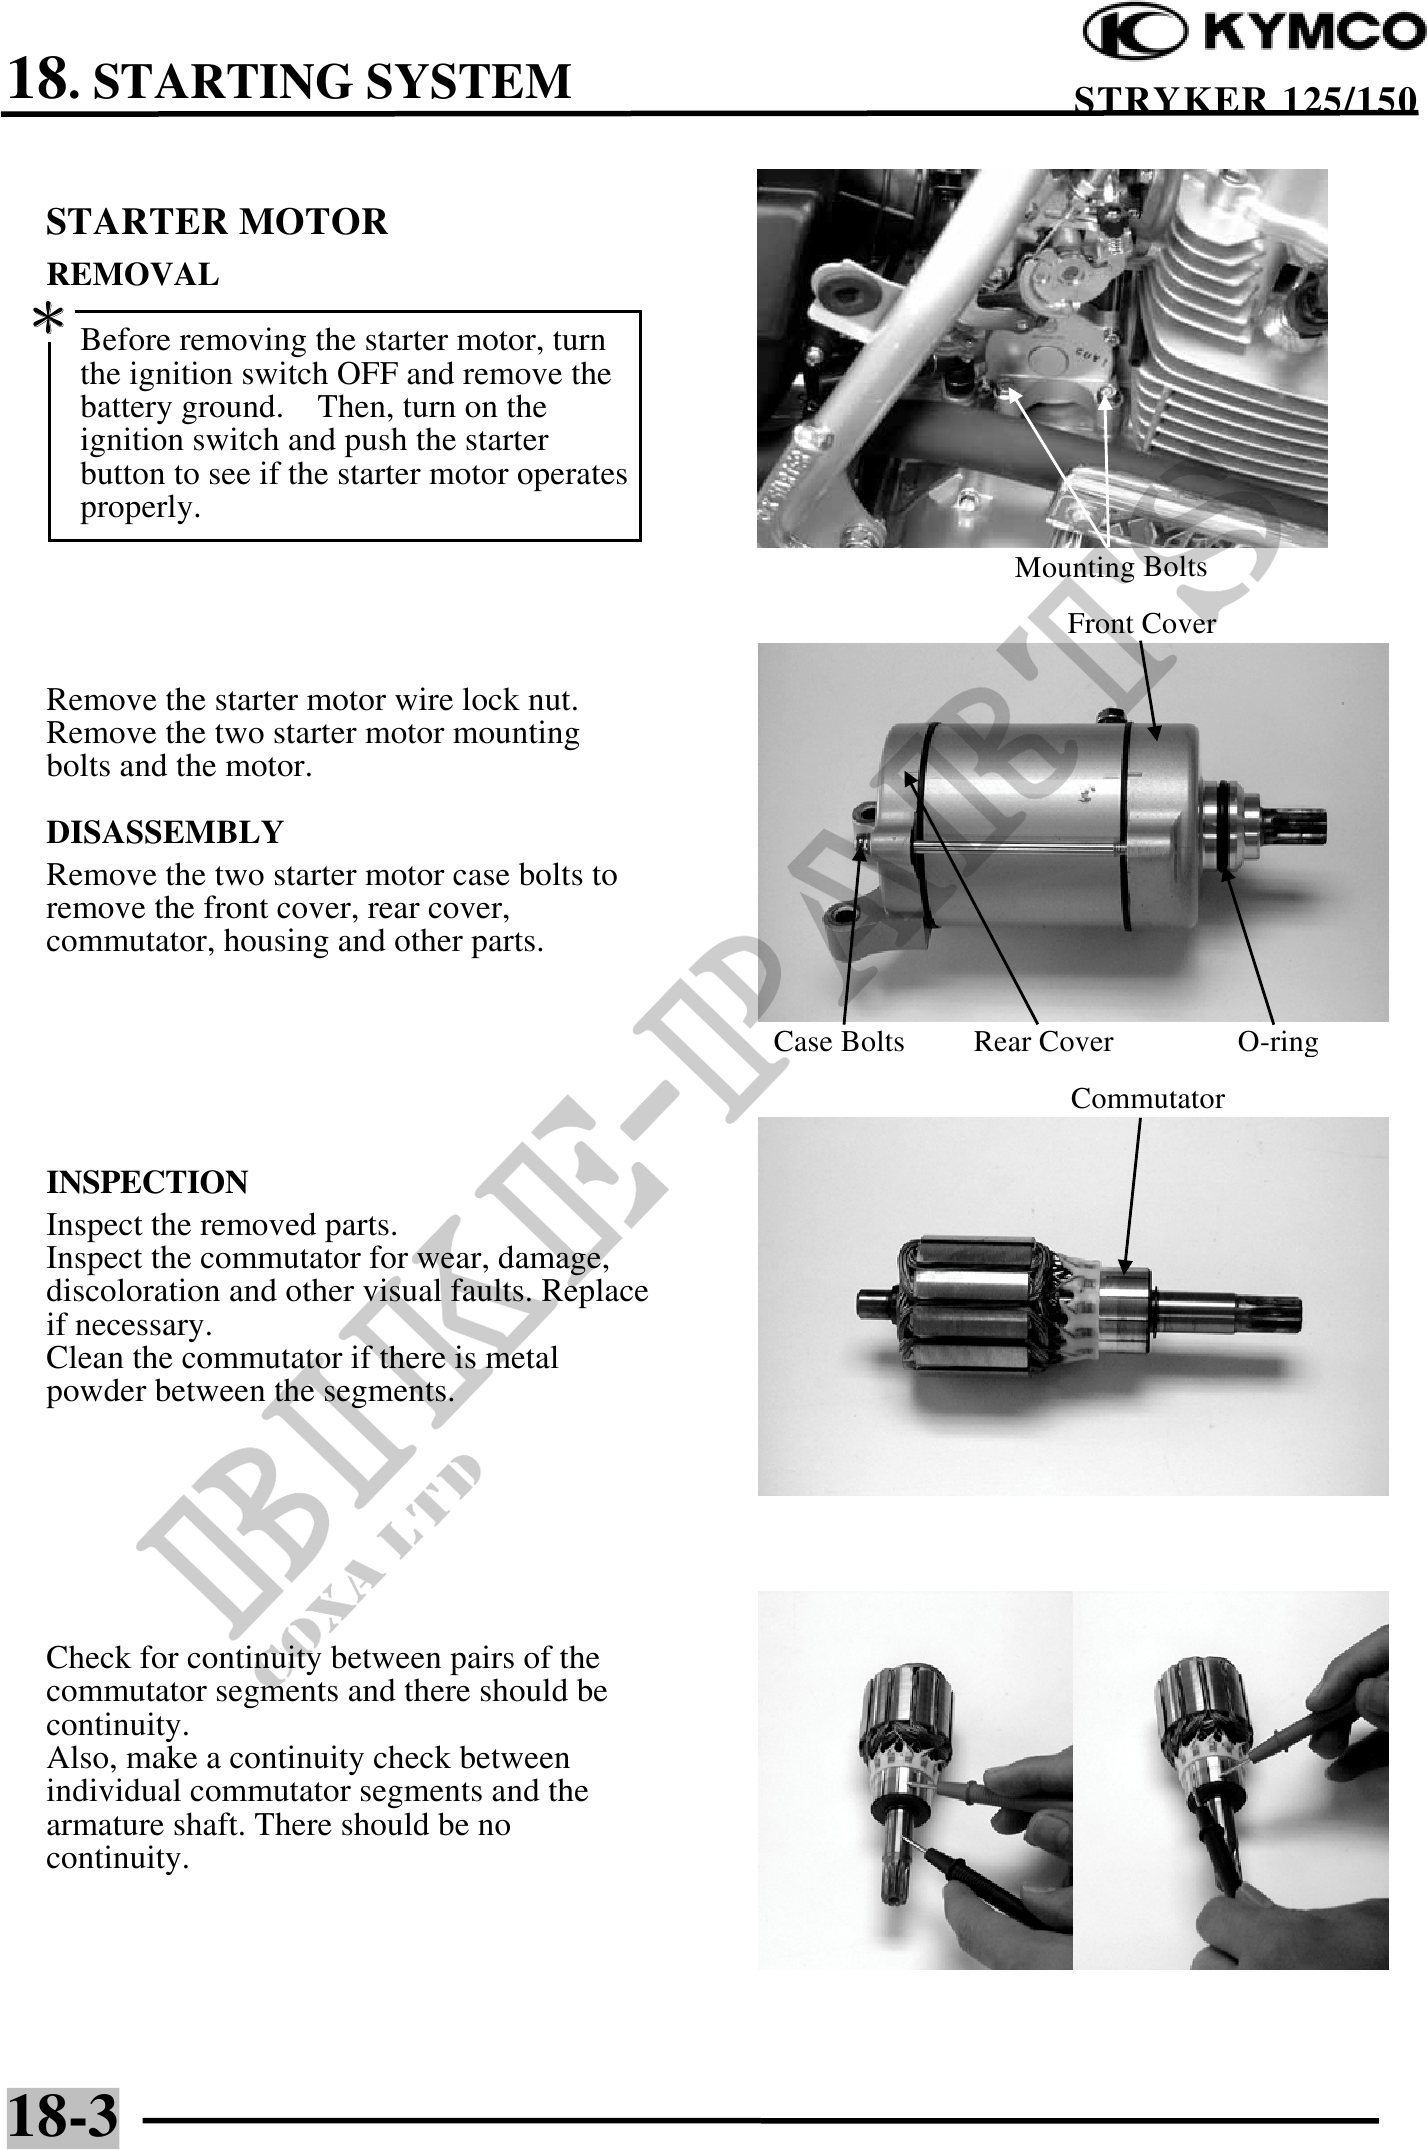
Mounting Bolts
Front Cover
Remove the starter motor wire lock nut.
Remove the two starter motor mounting
bolts and the motor.
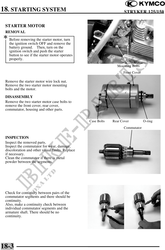
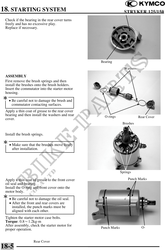
DISASSEMBLY
Remove the two starter motor case bolts to
remove the front cover, rear cover,
commutator, housing and other parts.
Case Bolts Rear Cover O-ring
Commutator
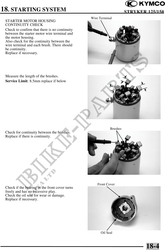
INSPECTION
Inspect the removed parts.
Inspect the commutator for wear, damage,
discoloration and other visual faults. Replace
if necessary.
Clean the commutator if there is metal
powder between the segments.
Check for continuity between pairs of the
commutator segments and there should be
continuity.
Also, make a continuity check between
individual commutator segments and the
armature shaft. There should be no
continuity.
18-3