18. STARTING SYSTEM STRYKER 125/150
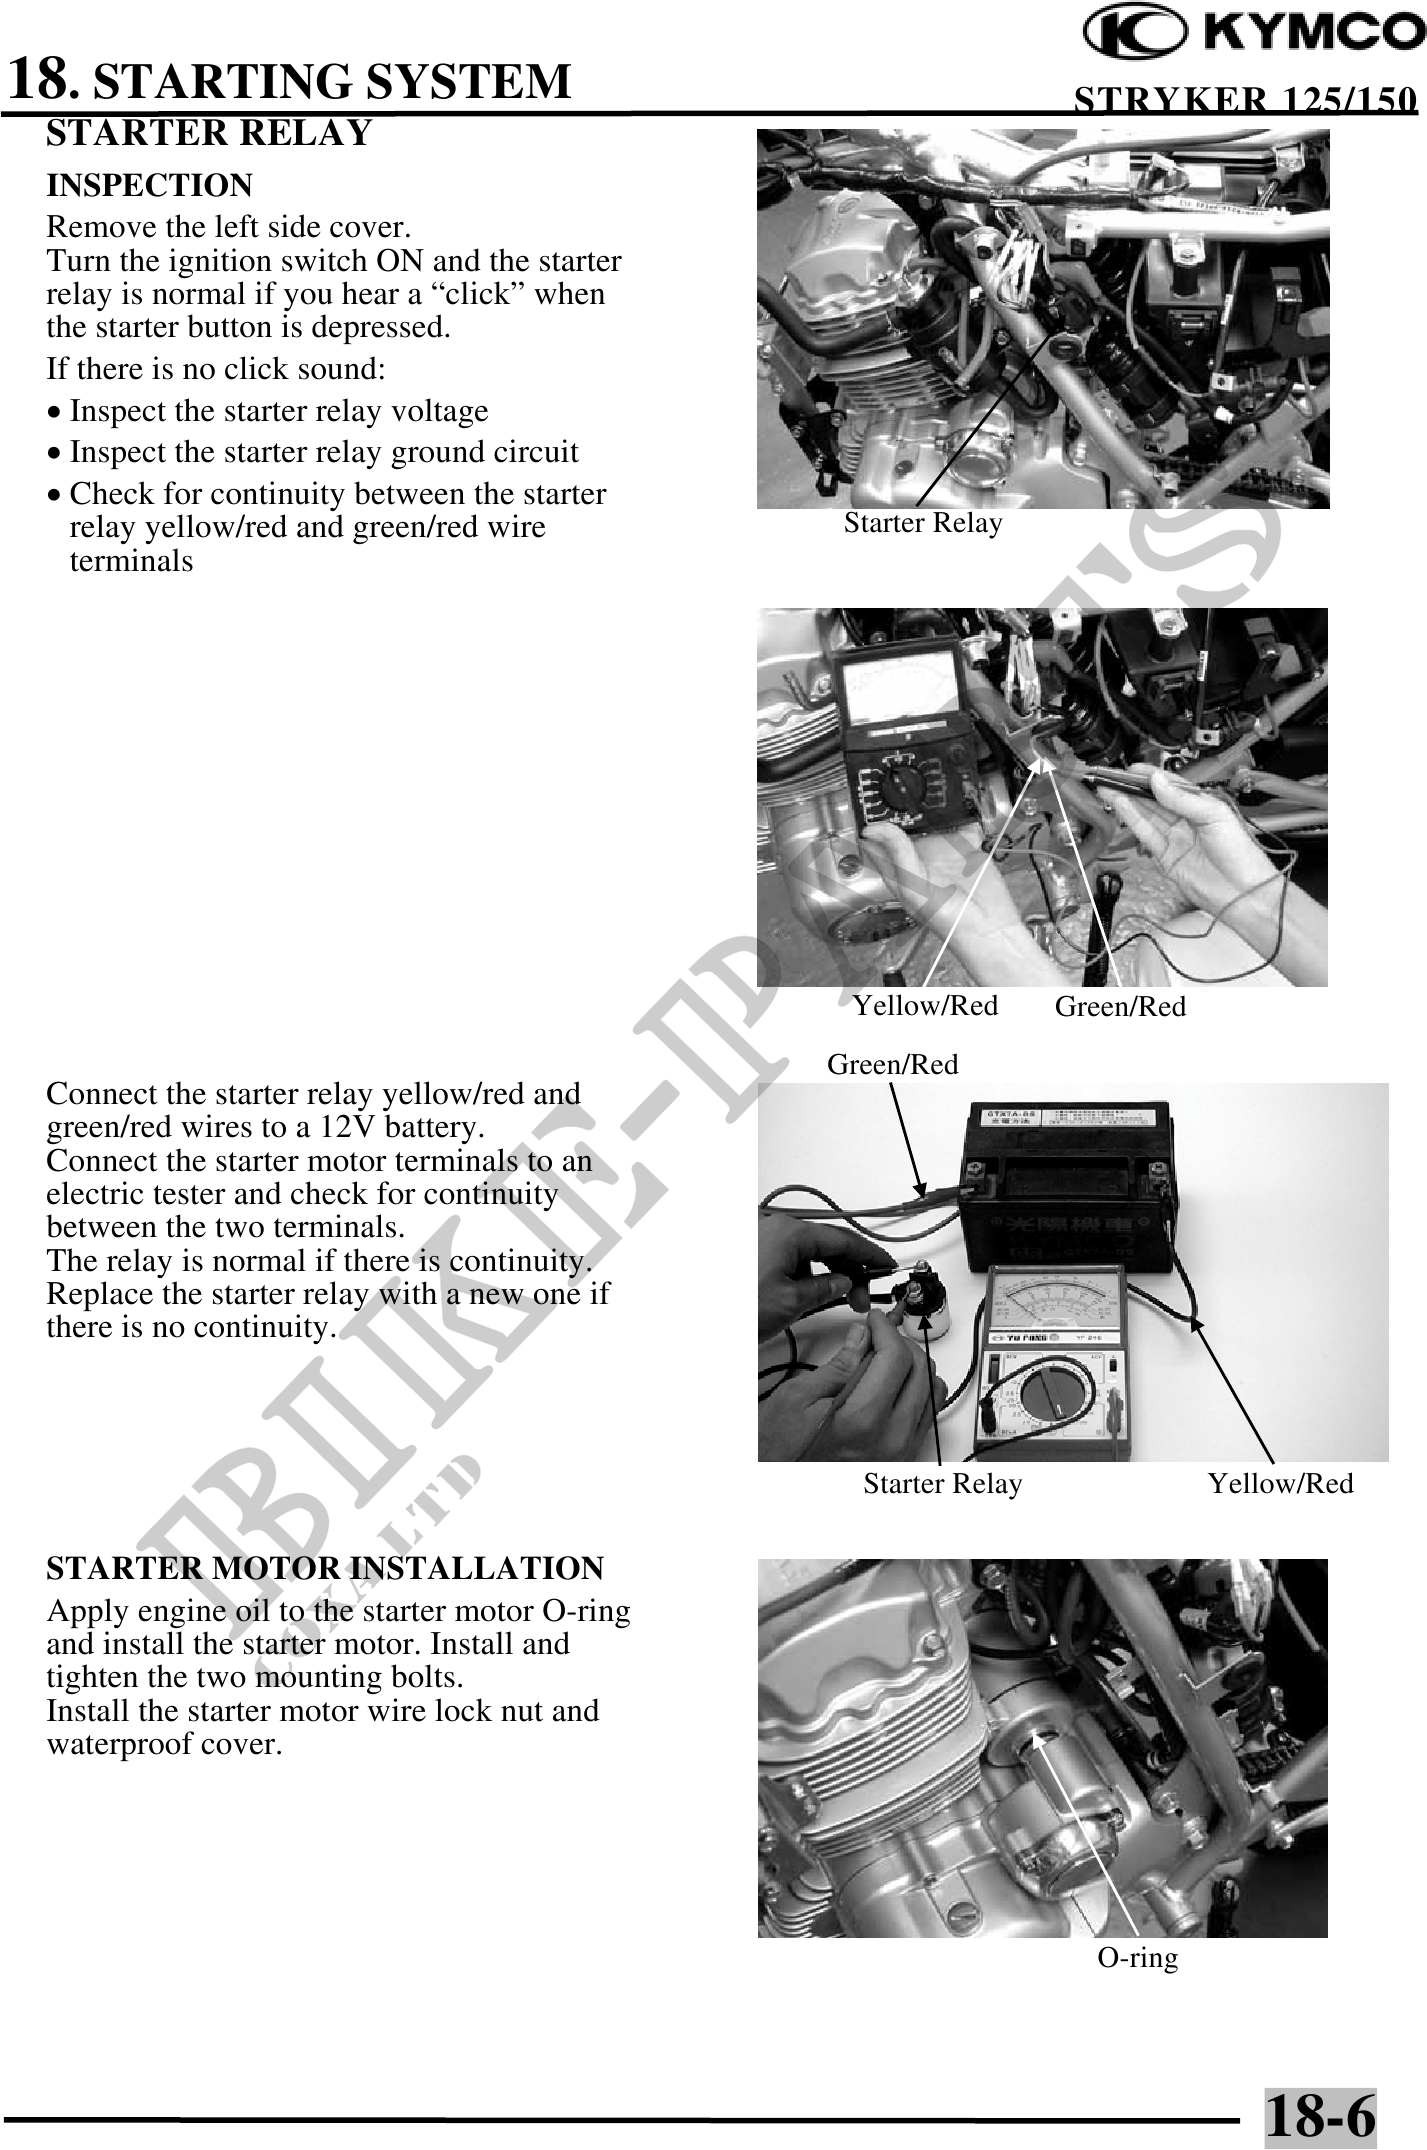
STARTER RELAY
INSPECTION
Remove the left side cover.
Turn the ignition switch ON and the starter
relay is normal if you hear a "click" when
the starter button is depressed.
If there is no click sound:
· Inspect the starter relay voltage
· Inspect the starter relay ground circuit
· Check for continuity between the starter
relay yellow/red and green/red wire Starter Relay
terminals
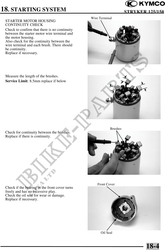
Yellow/Red Green/Red
Green/Red
Connect the starter relay yellow/red and
green/red wires to a 12V battery.
Connect the starter motor terminals to an
electric tester and check for continuity
between the two terminals.
The relay is normal if there is continuity.
Replace the starter relay with a new one if
there is no continuity.
Starter Relay Yellow/Red
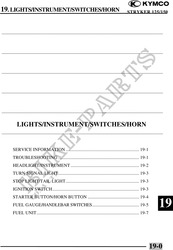
STARTER MOTOR INSTALLATION
Apply engine oil to the starter motor O-ring
and install the starter motor. Install and
tighten the two mounting bolts.
Install the starter motor wire lock nut and
waterproof cover.
O-ring
18-6