19. LIGHTS/INSTRUMENT/SWITCHES/HORN STRYKER 125/150
HEADLIGHT
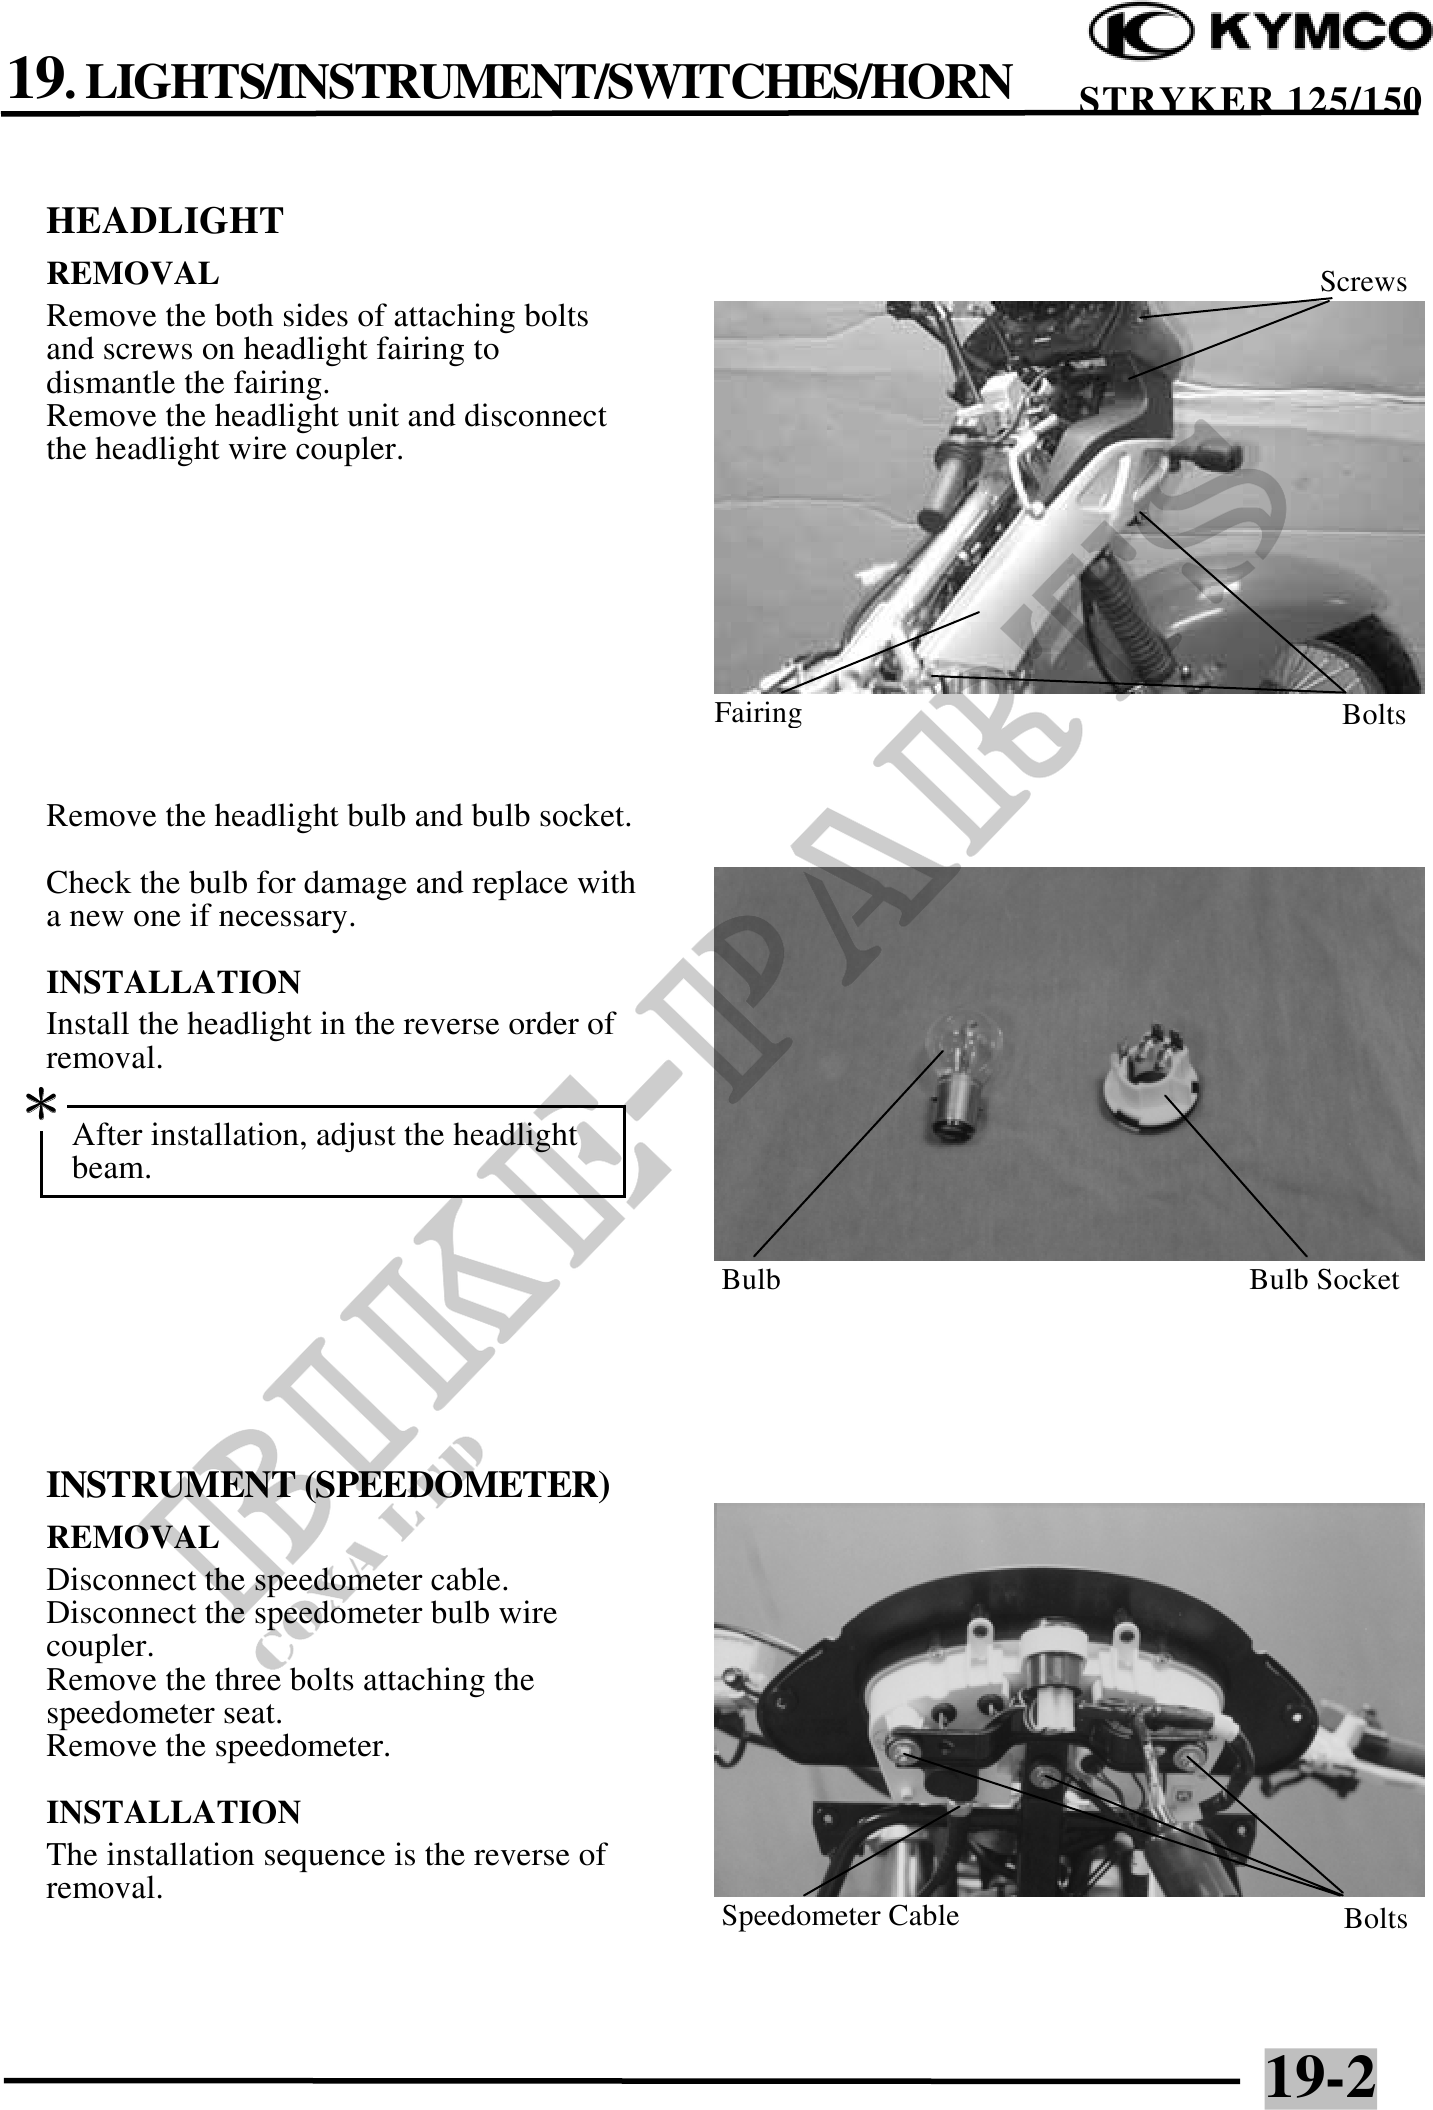
REMOVAL Screws
Remove the both sides of attaching bolts
and screws on headlight fairing to
dismantle the fairing.
Remove the headlight unit and disconnect
the headlight wire coupler.
Fairing Bolts
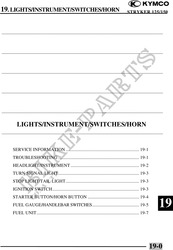
Remove the headlight bulb and bulb socket.
Check the bulb for damage and replace with
a new one if necessary.
INSTALLATION
Install the headlight in the reverse order of
removal.
After installation, adjust the headlight
beam.
Bulb Bulb Socket
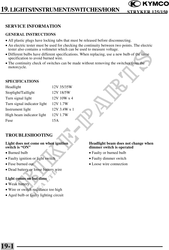
INSTRUMENT (SPEEDOMETER)
REMOVAL
Disconnect the speedometer cable.
Disconnect the speedometer bulb wire
coupler.
Remove the three bolts attaching the
speedometer seat.
Remove the speedometer.
INSTALLATION
The installation sequence is the reverse of
removal.
Speedometer Cable Bolts
19-2