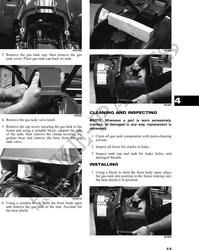
Choose your country
We work in partnership with many official Kymco dealers around the world.
You can select the country of your choice from the list below, whatever your choice, we can deliver worldwide!
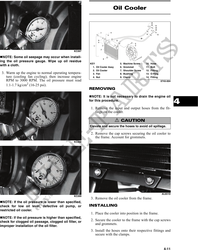
Oil Cooler
KC267
NOTE: Some oil seepage may occur when install-
ing the oil pressure gauge. Wipe up oil residue
KEY 5. Machine Screw 10. Hose
with a cloth. 1. Oil Cooler Assy 6. Grommet 11. Bolt
2. Oil Cooler 7. Shoulder Screw 12. Fitting
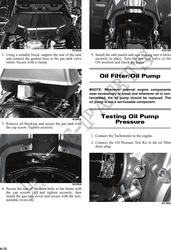
3. Warm up the engine to normal operating tempera- 3. Fan 8. Bushing 13. O-Ring
ture (cooling fan cycling); then increase engine 4. Nut 9. Clamp 14. Fitting
RPM to 3000 RPM. The oil pressure must read 0743-004
1.1-1.7 kg/cm2 (16-25 psi).
REMOVING
NOTE: It is not necessary to drain the engine oil
for this procedure.
4
1. Remove the input and output hoses from the fit-
tings on the cooler.
! CAUTION
Elevate and secure the hoses to avoid oil spillage.
2. Remove the cap screws securing the oil cooler to
the frame. Account for grommets.
KC268
AL651D
KC269
3. Remove the oil cooler from the frame.
NOTE: If the oil pressure is lower than specified,
check for low oil level, defective oil pump, or INSTALLING
restricted oil cooler.
1. Place the cooler into position in the frame.
NOTE: If the oil pressure is higher than specified,
check for clogged oil passage, clogged oil filter, or 2. Secure the cooler to the frame with the cap screws
and grommets.
improper installation of the oil filter.
3. Install the hoses onto their respective fittings and
secure with the clamps.
4-11