Choose your country
We work in partnership with many official Kymco dealers around the world.
You can select the country of your choice from the list below, whatever your choice, we can deliver worldwide!
A. When using an automatic battery charger, 11. Connect the battery cables (positive cable first);
always follow the charger manufacturer's then install the battery hold-down.
instructions.
B. When using a constant-current battery charger, ! CAUTION
use the following Battery Charging Chart. Connecting cables in reverse (positive to negative
and negative to positive) can cause serious damage
! CAUTION to the electrical system.
Never exceed the standard charging rate.
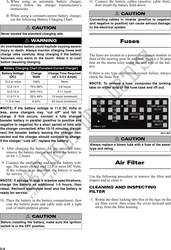
! WARNING Fuses
An overheated battery could explode causing severe
injury or death. Always monitor charging times and
charge rates carefully. Stop charging if the battery The fuses are located in a power distribution module in
becomes very warm to the touch. Allow it to cool front of the steering post. In addition, there is a 30 amp
before resuming charging. fuse on the starter relay under the seat next to the bat-
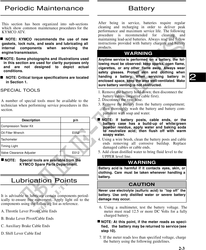
Battery Charging Chart (Constant-Current Charger)
tery.
Battery Voltage Charge Charge Time Required If there is any type of electrical system failure, always
(DC) State (at 1.5-2.0 Amps) check the fuses first.
12.5 or more 100% None
NOTE: To remove a fuse, compress the locking
12.2-12.4 75%-99% 3-6 hours tabs on either side of the fuse case and lift out.
12.0-12.2 50%-74% 5-11 hours
11.0-11.9 25%-49% 13 hours (minimum)
11.5 or less 0-24% 20 hours (minimum)
NOTE: If the battery voltage is 11.5 DC Volts or
less, some chargers may "cut off" and fail to
charge. If this occurs, connect a fully charged
booster battery in parallel (positive to positive and
negative to negative) for a short period of time with
the charger connected. After 10-15 minutes, discon-
nect the booster battery leaving the charger con- 0411-837
nected and the charger should continue to charge.
If the charger "cuts off," replace the battery.
! CAUTION
Always replace a blown fuse with a fuse of the same
8. After charging the battery for the specified time, type and rating.
remove the battery charger and allow the battery to
sit for 1-2 hours.
9. Connect the multimeter and test the battery volt- Air Filter
age. The meter should read 12.5 or more DC Volts.
If the voltage is as specified, the battery is ready
for service.
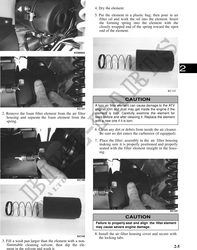
Use the following procedure to remove the filter and
NOTE: If voltage in step 9 is below specifications, inspect and/or clean it.
charge the battery an additional 1-5 hours; then
retest. Recheck electrolyte level and the battery is CLEANING AND INSPECTING
ready for service. FILTER
10. Place the battery in the battery compartment; then 1. Rotate the three locking tabs free of the lugs on the
coat the battery posts and cable ends with a light air filter cover; then rotate the cover forward and
coat of multi-purpose grease. away from the filter housing.
! CAUTION
Before installing the battery, make sure the ignition
switch is in the OFF position.
2-4