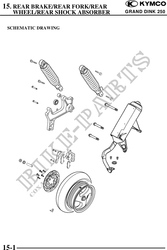
15. REAR BRAKE/REAR FORK/REAR
WHEEL/REAR SHOCK ABSORBER GRAND DINK 250
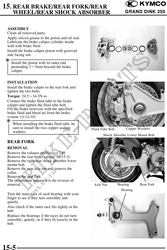
Fluid Tube Bolt
REAR BRAKE
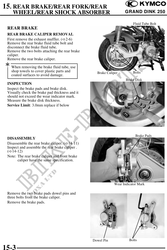
REAR BRAKE CALIPER REMOVAL
First remove the exhaust muffler. ( 2-6)
Remove the rear brake fluid tube bolt and
disconnect the brake fluid tube.
Remove the two bolts attaching the rear brake
caliper.
Remove the rear brake caliper.
When removing the brake fluid tube, use
shop towels to cover plastic parts and Brake Caliper Bolts
coated surfaces to avoid damage.
Brake Disk
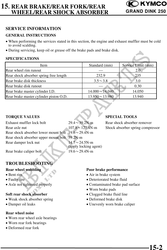
INSPECTION
Inspect the brake pads and brake disk.
Visually check the brake pad thickness and it
should not exceed the wear indicator mark.
Measure the brake disk thickness.
Service Limit: 3.0mm replace if below
Brake Pads
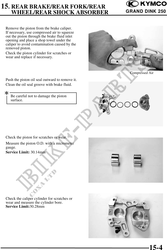
DISASSEMBLY
Disassemble the rear brake caliper. ( 14-11)
Inspect and assemble the rear brake caliper .
( 14-12)
Note: The rear brake caliper and front brake
caliper have the same specification.
Wear Indicator Mark
Remove the two brake pads dowel pins and
three bolts from the brake caliper.
Remove the brake pads.
Dowel Pin Bolts
15-3