Choose your country
We work in partnership with many official Kymco dealers around the world.
You can select the country of your choice from the list below, whatever your choice, we can deliver worldwide!
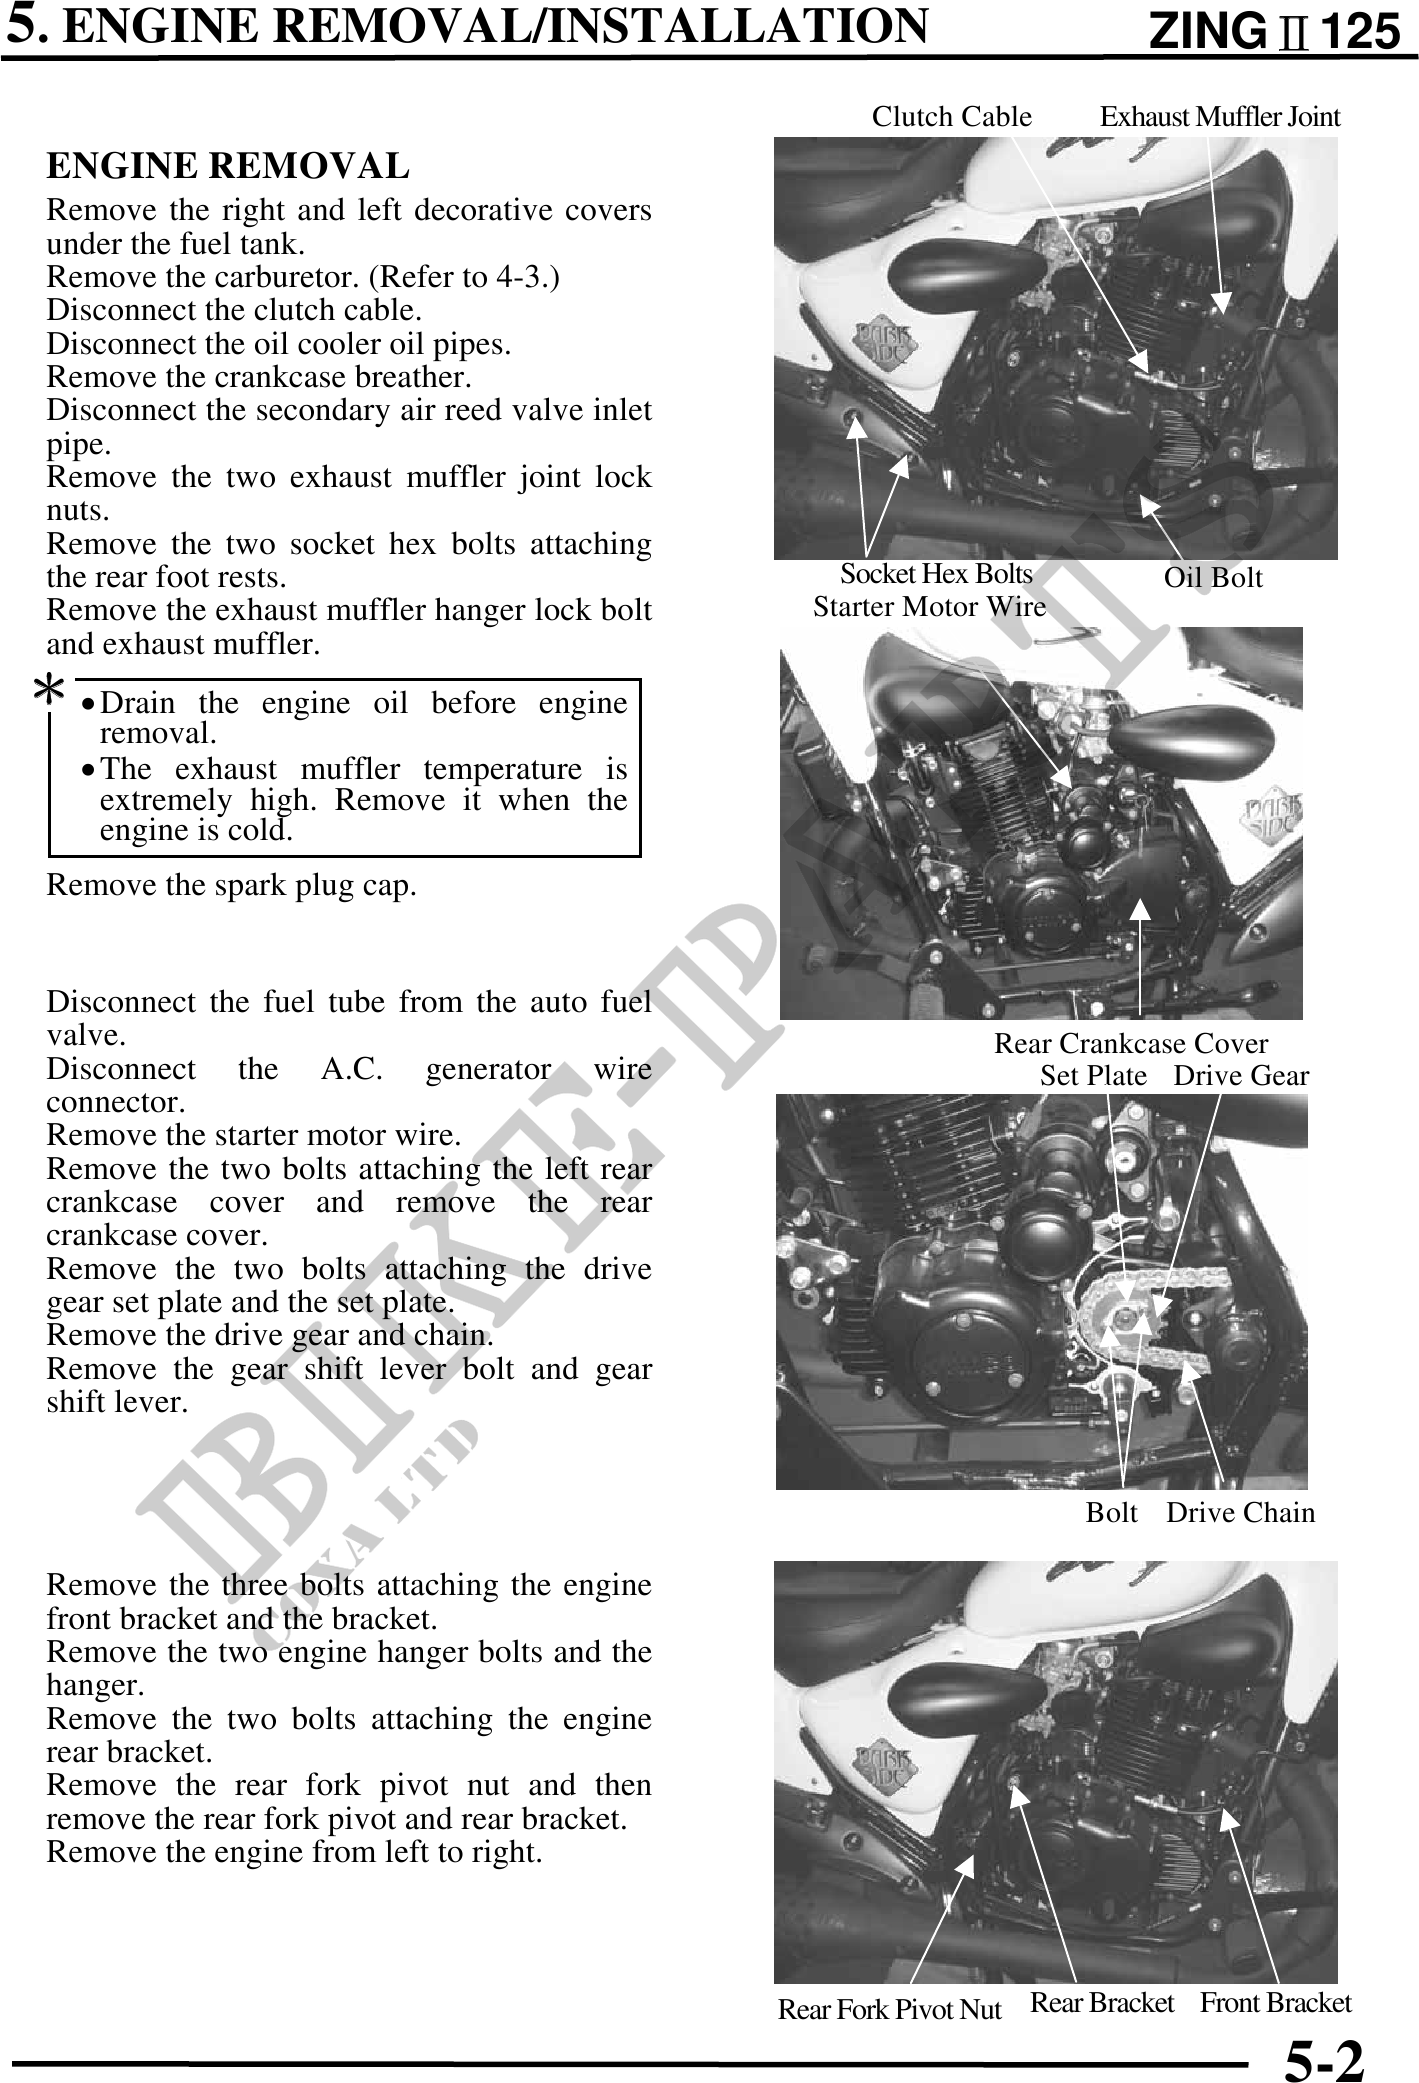
          5. ENGINE REMOVAL/INSTALLATION                                                ZING125
                                                        Clutch Cable      Exhaust Muffler Joint
 ENGINE REMOVAL
 Remove the right and left decorative covers
 under the fuel tank.
 Remove the carburetor. (Refer to 4-3.)
 Disconnect the clutch cable.
 Disconnect the oil cooler oil pipes.
 Remove the crankcase breather.
 Disconnect the secondary air reed valve inlet
 pipe.
 Remove the two exhaust muffler joint lock
 nuts.
 Remove the two socket hex bolts attaching
 the rear foot rests.                                Socket Hex Bolts          Oil Bolt
 Remove the exhaust muffler hanger lock bolt       Starter Motor Wire
 and exhaust muffler.
 · Drain    the engine oil before engine
     removal.
   · The exhaust muffler temperature is
     extremely high. Remove it when the
     engine is cold.
 Remove the spark plug cap.


 Disconnect the fuel tube from the auto fuel
 valve.                                                           Rear Crankcase Cover
 Disconnect the A.C. generator wire                                  Set Plate Drive Gear
 connector.
 Remove the starter motor wire.
 Remove the two bolts attaching the left rear
 crankcase cover and remove the rear
 crankcase cover.
 Remove the two bolts attaching the drive
 gear set plate and the set plate.
 Remove the drive gear and chain.
 Remove the gear shift lever bolt and gear
 shift lever.


                                                                         Bolt Drive Chain

 Remove the three bolts attaching the engine
 front bracket and the bracket.
 Remove the two engine hanger bolts and the
 hanger.
 Remove the two bolts attaching the engine
 rear bracket.
 Remove the rear fork pivot nut and then
 remove the rear fork pivot and rear bracket.
 Remove the engine from left to right.


                                                 Rear Fork Pivot Nut Rear Bracket Front Bracket

                                                                                          5-2