Choose your country
We work in partnership with many official Kymco dealers around the world.
You can select the country of your choice from the list below, whatever your choice, we can deliver worldwide!
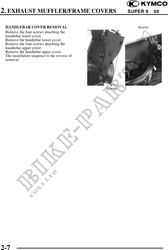
2. EXHAUST MUFFLER/FRAME COVERS SUPER 9 50
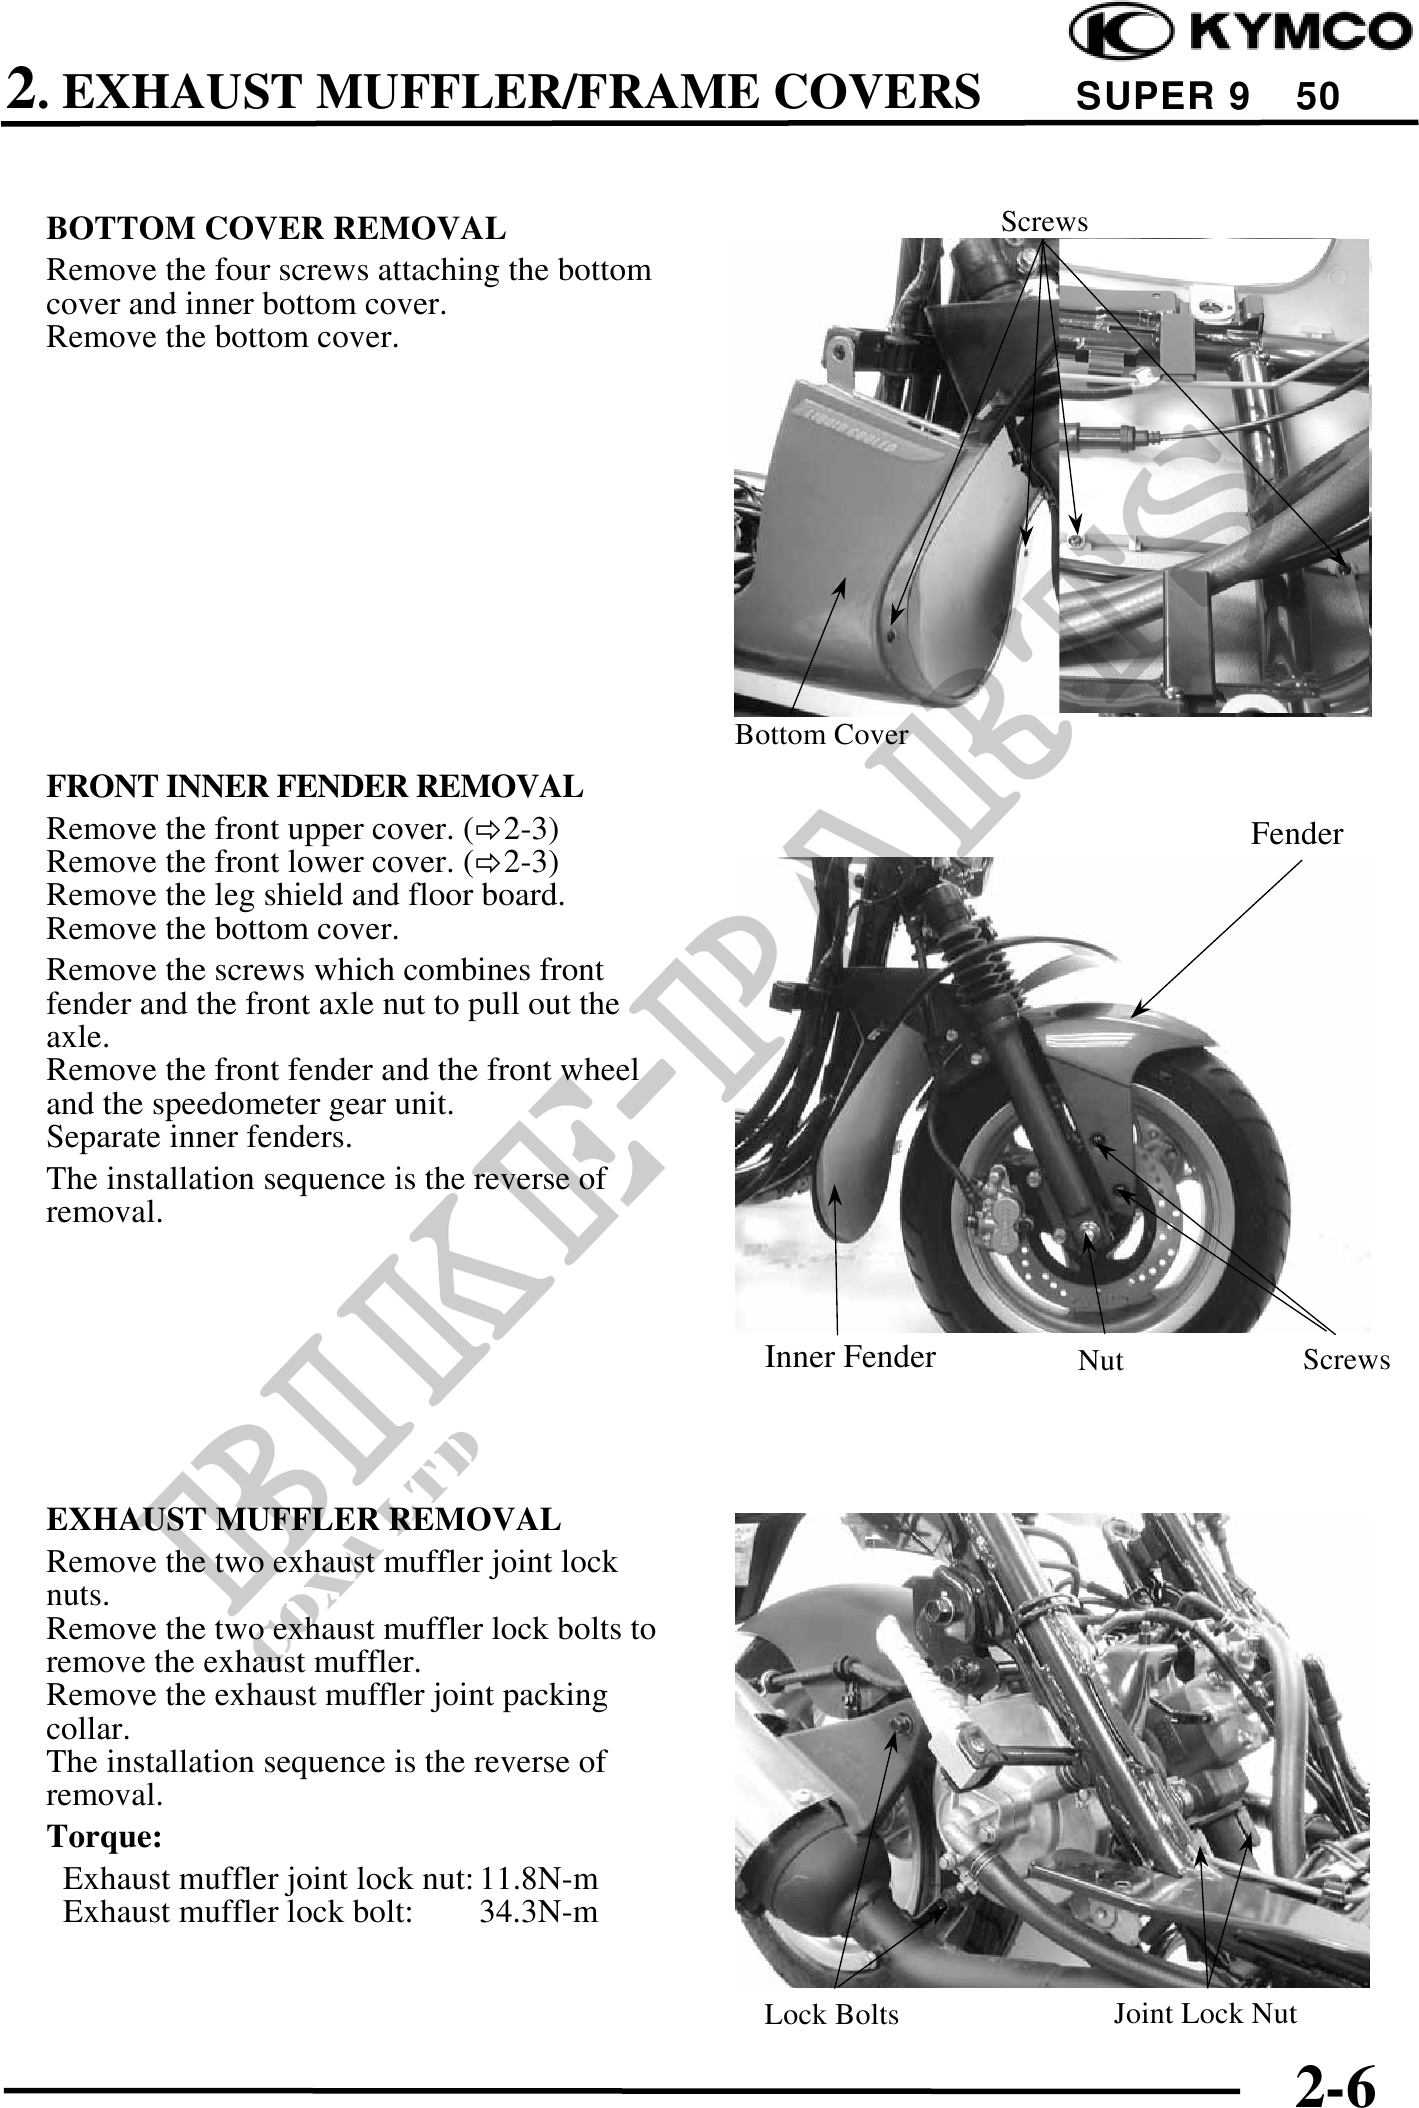
BOTTOM COVER REMOVAL Screws
Remove the four screws attaching the bottom
cover and inner bottom cover.
Remove the bottom cover.
Bottom Cover
FRONT INNER FENDER REMOVAL
Remove the front upper cover. ( 2-3) Fender
Remove the front lower cover. ( 2-3)
Remove the leg shield and floor board.
Remove the bottom cover.
Remove the screws which combines front
fender and the front axle nut to pull out the
axle.
Remove the front fender and the front wheel
and the speedometer gear unit.
Separate inner fenders.
The installation sequence is the reverse of
removal.
Inner Fender Nut Screws
EXHAUST MUFFLER REMOVAL
Remove the two exhaust muffler joint lock
nuts.
Remove the two exhaust muffler lock bolts to
remove the exhaust muffler.
Remove the exhaust muffler joint packing
collar.
The installation sequence is the reverse of
removal.
Torque:
Exhaust muffler joint lock nut: 11.8N-m
Exhaust muffler lock bolt: 34.3N-m
Lock Bolts Joint Lock Nut
2-6