Choose your country
We work in partnership with many official Kymco dealers around the world.
You can select the country of your choice from the list below, whatever your choice, we can deliver worldwide!
6. CYLINDER HEAD/CYLINDER/PISTON SUPER 9 50
CYLINDER/PISTON
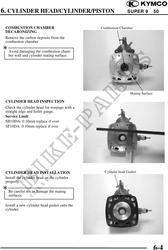
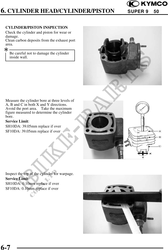
CYLINDER REMOVAL
Remove the met-in box and seat.
Remove the frame body cover.
Remove the cylinder head. (6-3)
Remove the two exhaust muffler joint lock
nuts and two exhaust muffler lock bolts.
Remove the exhaust muffler.
Remove the cylinder.
Remove the cylinder gasket.
Do not pry between the cylinder and
crankcase or strike the fins.
Exhaust Muffler Lock Bolts Joint Lock Nuts
Piston Pin Piston
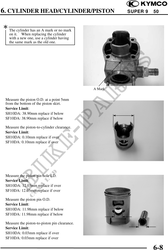
PISTON REMOVAL
Remove the piston pin clip to remove the
piston pin and piston.
· Do not damage or scratch the piston.
· Do not apply side force to the connect-
ing rod when removing the piston pin.
· Place clean shop towels in the crank-
case to keep the piston pin clip from
falling into the crankcase.
Piston Pin Clip
Spread each piston ring and remove by
lifting it up at a point just opposite the gap.
Remove the expander.
6-6