Choose your country
We work in partnership with many official Kymco dealers around the world.
You can select the country of your choice from the list below, whatever your choice, we can deliver worldwide!
PR287A KC283
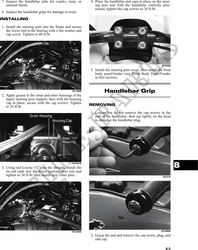
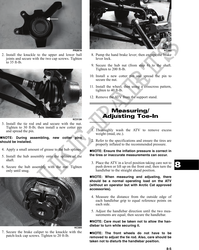
2. Install the knuckle to the upper and lower ball 8. Pump the hand brake lever; then engage the brake
joints and secure with the two cap screws. Tighten lever lock.
to 35 ft-lb.
9. Secure the hub nut (from step 6) to the shaft.
Tighten to 200 ft-lb.
10. Install a new cotter pin and spread the pin to
secure the nut.
11. Install the wheel; then using a crisscross pattern,
tighten to 40 ft-lb.
12. Remove the ATV from the support stand.
Measuring/
KC313A
Adjusting Toe-In
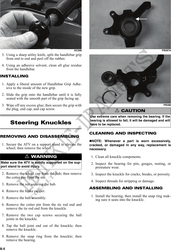
3. Install the tie rod end and secure with the nut.
Tighten to 30 ft-lb; then install a new cotter pin
and spread the pin. 1. Thoroughly wash the ATV to remove excess
weight (mud, etc.).
NOTE: During assembling, new cotter pins
should be installed. 2. Refer to the specifications and ensure the tires are
properly inflated to the recommended pressure.
4. Apply a small amount of grease to the hub splines. NOTE: Ensure the inflation pressure is correct in
5. Install the hub assembly onto the splines of the the tires or inaccurate measurements can occur.
shaft.
6. Secure the hub assembly with the nut. Tighten
3. Place the ATV in a level position taking care not to
push down or lift up on the front end; then turn the
handlebar to the straight ahead position.
8
only until snug.
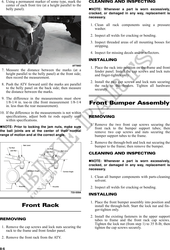
NOTE: When measuring and adjusting, there
should be a normal operating load on the ATV
(without an operator but with Arctic Cat approved
accessories).
4. Measure the distance from the outside edge of
each handlebar grip to equal reference points on
each side.
5. Adjust the handlebar direction until the two mea-
surements are equal; then secure the handlebar.
NOTE: Care must be taken not to allow the han-
dlebar to turn while securing it.
KC305
7. Secure the brake caliper to the knuckle with the NOTE: The front wheels do not have to be
patch-lock cap screws. Tighten to 20 ft-lb. removed to adjust the tie rod. Also, care should be
taken not to disturb the handlebar position.
8-5